PMC Silver Domed Earrings
Are Easy To Make
Precious Metal Clay Earrings
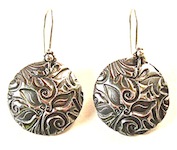
Making PMC silver domed earrings Is an easy and quick precious metal clay jewelry tutorial.
Materials
- 8g of Art Clay or PMC3
- 1 pair of sterling silver ear wires
Tools
- Small rolling pin
- Rolling slats or playing cards
- Teflon work surface
- Cool Slip or olive oil
- Textured stamp
- Circular cutter 1 ¼ inch diameter
- Sanding pads or wet and dry sandpaper
- Paintbrush
- Stainless steel brush
- Stainless steel burnisher
- Butane kitchen or soldering torch
- Heat resistant mat
- Tweezers or tongs
- Baking paper
- Domed metal measuring spoon
Step 1
Lightly spray your hands with either cool slip or rub a few drops of vegetable oil on your hands then rub over your rolling mat and on your roller.
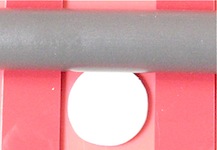
Roll approximately 4 grams of PMC into a ball with your hands then place on rolling mat between your two playing cards or slats and use your roller and roll into a circle.
Step 2
Spray cool slip or brush vegetable oil onto your texture plate. Remember you only need a small amount to stop the clay from sticking, too much and the impression won’t be as crisp.
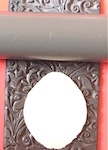
Place the clay circle onto the texture plate and roll your roller gently but firmly over the clay. Lift the clay off the texture plate carefully. Don’t worry if the first attempt doesn’t work as you can always go back to step 1 and start again.
Step 3
Spray cool slip or brush vegetable oil on the edge and inside of the circular cutter then place on top of the patterned clay and press down. You now have your first earring.
Repeat Steps 1 to 3 for the matching earring.
Step 4
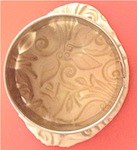
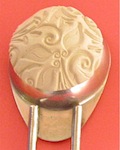
Place the textured circle on a domed surface sprayed or brushed lightly with oil or cool slip. I have used a domed metal measuring spoon but you can use any domed surface that suits you.
If you use a metal measuring spoon this can be placed on a warm hotplate or cup warmer to dry otherwise leave to air dry which could take a few hours.
Tip: You can tell when your clay piece is fully dry by placing it on a mirror for five seconds. If there is condensation on the mirror when you remove the piece, then the piece is not yet dry.
Step 5
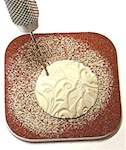
Once the pieces are completely dry use either a medium grit sanding pad or wet and dry sandpaper, finishing off with fine grit. Use a circular motion so that you get an even edge.
Drill a small hole for the ear wire. Be careful not to drill the hole too close to the edge as the clay shrinks during the firing process.
Step 6
Once the pieces are thoroughly dry then fire them using a kiln, hot pot, butane torch or gas stove following the manufacturer’s instructions.

When the pieces are cooled brush them with a stainless steel brush to smooth the surface and give a matt silver appearance.
Mix liver of sulphur
solution following the manufacturers directions and dip your pieces until you have the desired patination.
Rub a metal burnisher over the piece so that the pattern is highlighted. Attach the ear wires.
You now have a pair of beautiful PMC silver jewelry earrings.
PLEASE NOTE: If you prefer the earrings to be plain silver then use a rotary tumbler or rub with a silver polishing cloth and do not use any liver of sulphur.
Return From PMC Silver To Precious Metal Clay
Return From PMC Silver To Jewelry Making How To