A Domed Resin Pendant
Is Simple To Make

Making a domed resin pendant using resin, colored paper and a pendant frame.
This is a very simple design that is easy to make and can be made quickly.
There are a very large range of different shaped frames that can be used for this project. The image used in this project has been cut from gift paper and sealed before being coated with resin.
Supplies:
1 pendant frame
"Ice" Resin
Japanese gift paper
Mod Podge
Mixing cups
Stirring stick
Safety glasses
Protective gloves
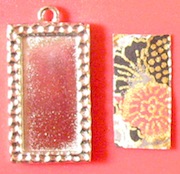
Commence by cutting out the image you wish to use; the image should fit neatly inside the pendant.

When using paper, card, photo or anything porous it must be coated with sealant to prevent the resin from seeping into it and destroying the image.
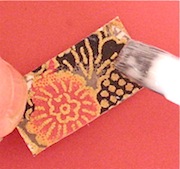
Firstly coat the underside of the image with Mod Podge or white glue.
When dry, apply another coat and fit inside the frame whist the glue is still tacky.
Apply a coat of Mod Podge all round the edges and over the image. Repeat if necessary.

Remember to always wear your protective gloves and glasses whilst working with resin.
When image is dry pour 1 part resin and 1 part hardener into separate cups. Pour hardener into resin and stir for a few minutes to ensure it's fully mixed.
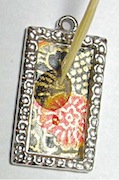
Use your mixing stick to gently apply mixture into the frame until the image is completely covered. Continue to add mixture until the frame is full and the resin begins to mound up in the middle.

If any bubbles form either use a heat gun, or blow gently across the frame to remove the bubbles.
Place a cover over the frame to protect it from dust and leave to set as per the maker's directions.
Although difficult to see the dome in the top photo this is the finished product. The dome gives the pendant a nice depth over the image.
You can use this method on frames of all shapes; it can also be used with silicone molds.
Return From Domed Resin Pendant To Resin Jewelry
Return To Home Page


